Frameless Doors
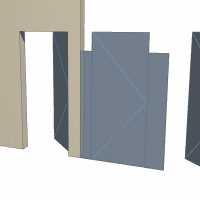
ArchiCAD, from my experience, doesn’t like making frameless doors. It seems so obvious, just set the frame dimensions to zero, press okay, and then go to lunch. Try again. If you go the simple route of setting the frame to zero, archicad will freak out. It might work in 3D, but you’ll get lots of error messages. I don’t like error messages.
One solution is to make a custom door. I have a post brewing about a recent experience with that…in the meantime there are great posts on the forum about how to make a custom door. But here’s my solution using D1 entrance 14 (it will work for other doors as well): frame style 3, frame width = 1/16”, rebate = 1/16”, frame depth = door thickness or wall thickness, wall closure set to brick veneer (in v14), rough opening = 0″.
The key is frame style 3 where frame width = rebate with.
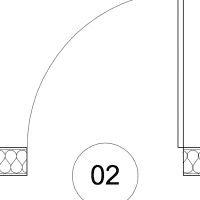
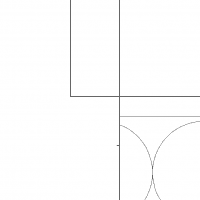
There’s a small line on the plan, but line weights cover it up. No error messages, looks good in 3D, in elevation, and in section. And the door can even go above the wall height without error messages or ugliness to clean up in any 2D view. Perfect for shower enclosures. I’m going to look into using this for cabinetry doors. So instead of my slab cabinets, I am going to try walls and frameless doors.
Pingback: A lot safer, a lot more secure... » Shoegnome
Rob
it appears that for a pocket door…there is no “frame style” to be able to set 🙁
Jared Banks
In the ArchiCAD 18 USA library, D1 Pocket 18 has an option to turn off the frame though.
Shelli Mittmann
Hi Jared – Have you ever seen a solution for a shower door that includes a window frame (s) at one side or the other (you know, a custom shower door with a 1/2 wall / frameless window combo with sloped tile sill, etc.)? Or a window framed corner that is in combination with the same shower door? I have tired numerous ways to show this accurately plus have it show up correctly in the door schedule (that would be provided by the custom shower door maker, not a window manufacturer). A regular door doesn’t allow you to raise the sill height of just the sidelight to accommodate this detail? Nor does it allow for a connected, frameless, window at the corner. Any thoughts? I am using ArchiCAD 20 USA. The only way I have ever been able to accomplish this is using 2D lines. But then I forego the beauty of the automatic door schedule……Thank you for your input in advance.
Jared Banks
There’s a few ways to tackle this. If I needed to schedule all of that, I might build each component as a separate element and then schedule them using whatever criteria is necessary to properly isolate them. The door might be a frameless door in a wall that’s the same size as the door. The sidelight might be a Morph or cube Object (Basic shapes) or a Beam or another Wall. Whatever is necessary to get the elements created as discrete things that can be scheduled separately. Does that make sense? You could also look to model both the door and sidelight as regular Doors and Windows. In that case just fiddle with things to turn off as much of the trim/frame as possible. You could possibly just use the same frameless technique for the window. So both sidelight and door are Door Objects.
If you do that, to get whatever frame you need around the glass/door, select the No Grid door leaf and set the frame of the leaf to be minimized. Or create a custom leaf.
Shelli Mittmann
Thank you Jared – we are trying a couple of those to see which we like best.
Jared Banks
Let me know what you decide to go with. Or if one of the methods comes close. Feel free to e-mail me screenshots.
Shelli Mittmann
We created a 1/2 wall, then placed an all glass wall on top of the 1/2 wall (i.e. 5/8″ x 48″ x 42″). Then created a frameless glass window out of a slab and inserted that into the glass wall. The glass wall and glass panel have the exact same dimensions. This way we get the window tag and automatic schedule labeling. Yay!
Jared Banks
Nice solution! I was about to say that’d make a good blog post topic, then I remembered I’ve essentially already written about that technique here: Custom Empty Openings in ARCHICAD. I should have thought of that sooner. Simple custom Windows are really easy to make, and what you did is also easily resizeable without having to worry about GDL scripting.
Rob
Shelli:
Show us your solution.
Can you take a screen snapshot of how it looks, inclusive of the walls parameters. thanks,
Most helpful.
Shelli Mittmann
I would except I cannot figure out how to paste the screen snapshot into this reply. This could explain to you why I struggled with this solution to begin with LOL! I am sorry.
Rob
No worries. I usually just setup a FREE photobucket account, upload my pictures to my photobucket account and then just click on the URL and copy/paste the location of the picture within the photobucket account into the body of a reply. it’s crude, dinosaur-ish way of doing it but its worked so far.
Joe Johnson
Any advice on parametric glass shower doors systems?
Jared Banks
Yes and no.
No: I just use the out of the box doors in a slightly improved version of what’s described in this video. Download the Shoegnome Open Template and look at the two shower door favorites (swing and slide). I’ll put those in a thin (1/2″ glass Building Material) wall and it works great. If I need to show fancy sliding door hardware, I’ll model that separately with beams.
Yes: you could save the sliding door hardware as an object (or script it) and add some intelligence to it, so that it’s easy to place and stretch. That’s on my to do list. It’s possible you could save the hardware as door handle and use the door handle feature of a sliding door to make it integral to the door. That’s also on my to do list to explore, but I haven’t had time.