If you haven’t read the first blog post and watched the first video in this series, click here. In part 2 of this series we’re going to look at Design Options on an active project, and how Design Options can improve the organization of a template. Below the video are some thoughts on the radical transformation Design Options brings as well as a couple of items I forgot to mention in the video.
The All Mighty Design Grid
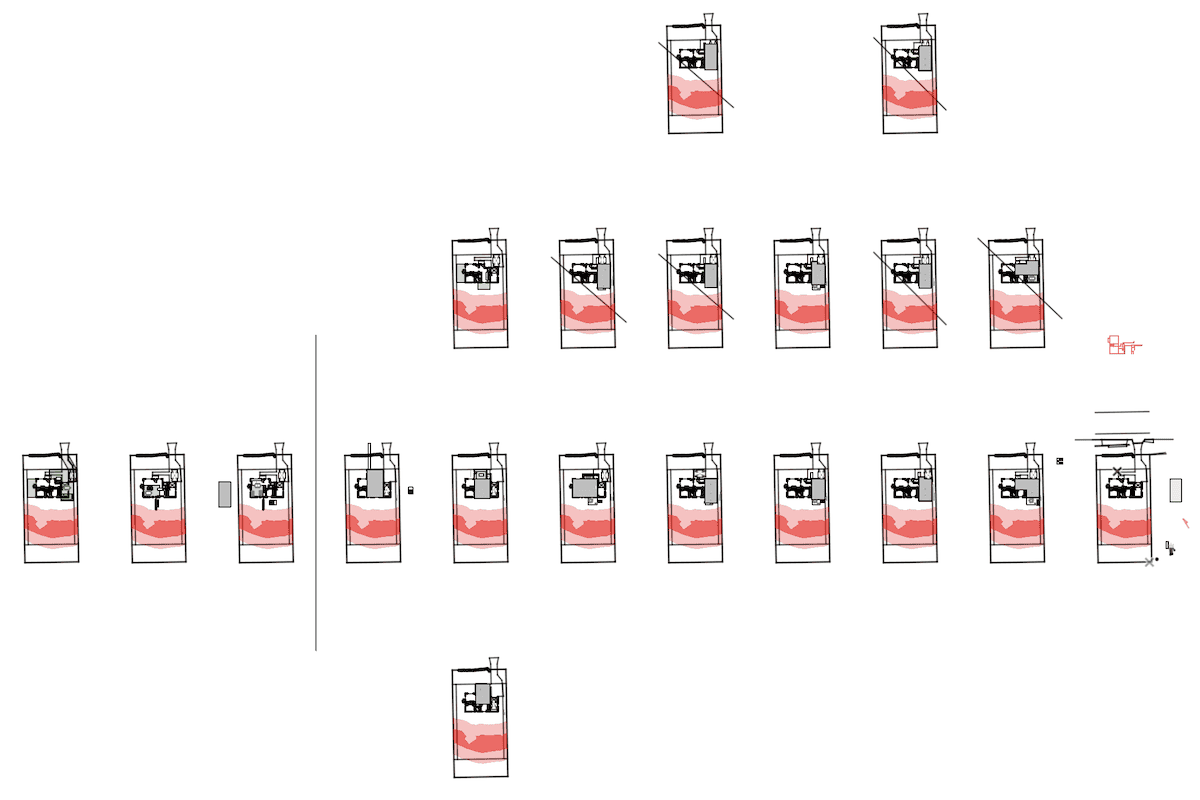
I started the project in the video above in Archicad 26. The first round of schematic design was the standard grid of plans (below). It’s the same grid I’ve been creating for design iterations since I first used AutoCAD in college. From early 2001 during my sophomore year at Rice University until late 2023 when I worked on the above schematic design, the core of my design process remained the same: the grid of options copied 50 or 100 feet up, down, left, or right. I switched from AutoCAD to Vectorworks to AutoCAD to Archicad. I transitioned from 2D to 3D. I went from employee to firm owner. I moved all over the country. I’ve had a successful career and many happy clients. And yet the grid remained, unchallenged. Sure not every project needed the grid. And it was supplemented by the equally classic Save As. But the grid continued as a central tenant of digital design.

The Grid was never really my Friend
Over time I got more value out of the design grid, but its usefulness was always limited. While most of the elements in the grid above are 3D, the eventual schematic design meeting was all plan discussions. While I could flip between PDFs or Layouts or quickly pan to compare schemes, it was far from fluid using the various schemes as reference points during design. Organically switching between two options being discussed was never seamless. When placing all these Views on Layouts, I had to place one, duplicate the Layout, move the center of the View on the new Layout a set dimension—which I could never remember and was always different project to project—to get the new scheme aligned properly (like 10 1/4″ or however far apart they are in the model converted to the scale of the view), and then repeat for every scheme. With Design Options, I just save Views with different Design Option Combinations, place the first View on a Layout, copy the Layout, and replace the View with the next View. Adding a new option is just a matter of a new Combo, View, and Layout. Everything is aligned and easy to reproduce project to project. If I had a typical set of Options, all those Views could be set up as defaults in my template. Every project could start with five 8.5 x 11 sheets with Scheme A-E Views all set up.
Side note: I need to explore adding Design Option Combinations A-E to my template. They could all just show to the main model to start like my ‘Proposed Plan’ Combination (no need to set up a bunch of Design Option Sets). All five Design Option Combinations could be pre-linked to schematic Views and Layouts. As I create different variations to show my clients, I’d just have to update the Design Option Combinations, and all the plans, sections, elevations, schedules, and sheets would be automatically populated. That’s an idea worth exploring. And five is probably the right number. How often do we share more options than that?
Here’s a few other ideas that didn’t fit into the video (ie, I forgot):
We can have additional Design Options for other template items. You could have a Design Option for legends. By putting your legends on a floor plan in a dedicated Design Option, your legend can be fully 3D, scheduled, and then be hidden from every view and data set other than the legend view(s). All the items in the legend can have the correct Layer, Renovation Filter, etc. They can just BE the elements. Which also means your legend can be used in conjunction with Parameter Transfer as a combination of legend and visual favorite.
You could have a Design Option Set for permit document data and one for construction document data. Or maybe one for permit document only, construction document only, and permit & construction document. You’ll have to be careful with which is the active Design Option when adding notes, but it could be really slick. No need to manage different Layers. Just work and move notes between the three Design Options as needed. And if you set all your views to a ‘Proposed Plan’ Design Option Combination like I discuss in this video, all you need to do is update that combo and ALL YOUR DRAWINGS will have the right data.
If you want all the latest Shoegnome Open Template news, sign up for the mailing list
If you aren’t using the current version of Archicad, you can download older versions of my template. If you use my template, I highly recommend you use my Work Environment as well. The two work together well and the Work Environment is designed to reinforce the best practices of the template. You can download my Work Environment here.
Subscribe to my blog to read more about the tricky world of being an Architect in the 21st century. Follow Shoegnome on Facebook, Instagram, and Youtube.
1 thought on “Design Options in Archicad (Part 2 of 4)”
Pingback: Design Options in Archicad (Part 3 of 4) - Shoegnome Architects